Ever wished your teen would, just once, tell you that you’re “totally, totally, the BEST MOM EVER!!!”?
Here’s what you do:
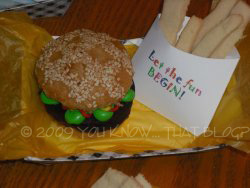
Now, I can’t in good conscience take credit for the idea behind this utterly cute design – it came from Bakerella herself. I absolutely fell in love with it, and decided to do this idea for my teen daughter’s “School’s Out” sleepover/pool party today. Bakerella did it for Father’s Day, but it can obviously be adapted for any occasion. She has a PDF template for the tray and the french fry holders on her website (includes a father’s day template, and a blank one too). I opened the french fry portion of the PDF file in Photoshop and did my own creations. Then I had them printed on card stock at the local Staples. Bakerella did the french fry holders in vellum, but as I didn’t have any and didn’t want to buy any, I did them in card stock as well. (see note below about this!) These two items are absolutely necessary, even though they’re time consuming to say the least! Thankfully ShaMoo and Doodle Cakes helped out with the folding on those!
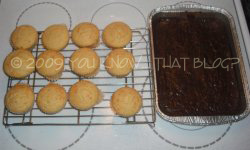
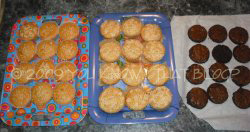
You start with basic cupcakes and brownies…
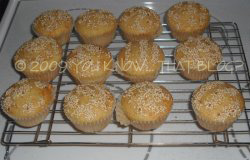
Add a little somethin’ somethin’ (in this case, toasted sesame seeds)! I had fun… did you know that if you dab a little water on the top of the cupcake with your finger tip, the sesame seeds will only stick to that very spot? You can do fun things with sesame seeds. Of course, I was pretty tired at this point, given that it was closing on midnight… so maybe it just seemed like fun?
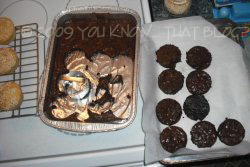
Now cut out your hamburger patties! Use a cutter about the same size as the top of the cupcake. Too big and it will overwhelm… too little and it’ll be lost. And yes, I used a disposable aluminum foil pan for the brownies. My silicone switchover does not yet include a long rectangular pan!
The cake recipe makes 24 cupcakes, so I decided to make 24 “burgers”. Yes, I can count… there are 24 cupcakes and only 12 “hamburgers” in this shot. I had to do another pan of brownies today because I ran out of eggs! Who leaves 2 (yes, T-W-O!) empty egg cartons in the fridge, I ask you? My family does, that’s who. Of course, both of the individuals who are allowed to touch eggs deny doing so. But we know who really did it, don’t we darling?
Anyway.
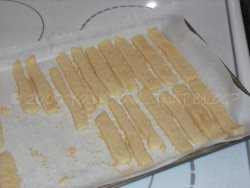
Make your “french fries”! These are basic sugar cookies, cut into skinny strips. Here’s a tip for you: Don’t make them too long. Sugar cookies are fragile, and they will break. You can also sprinkle large granule sugar over the cut strips and press lightly before baking – this will make them look “salted”. I forgot to do this on the first pan, and it’s much hard to get sugar to stick after they’re baked. Mine also didn’t brown the way I wanted them to, but overall I was pretty happy with them.
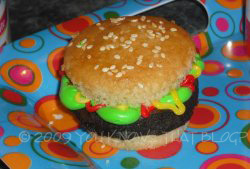
Next step: Assembly! Here I have to apologize – I was running short on time and didn’t stop to take pictures of the assembly of the burgers. Basically, you separate your batch (or can) of white icing into 3 bowls, and tint them green for lettuce, red for ketchup, and yellow for mustard. Put them into small baggies, and snip a very small bit of corner off so you can squeeze the “condiments” over your patties. I actually had 2 cans of premade icing in red and yellow, so I used those and just made the green one. My assembly went thusly:
- Cut cupcake in half, and place a brownie patty over the bottom cupcake half (duh). Here’s another tip though – flip that brownie over! The moister bottom looks so much more like a real burger patty than the lighter brown, dry top. I also moistened my finger tips and brushed off any brownie crumbs and pressed in any rough edges to make it look like a finished burger patty.
- Pipe the “lettuce” in swirls around the edges of the patty – total coverage is not necessary, nor is it desirable. Where you would like to see the “lettuce” sticking out is really the only place you would want to pipe it on. Do the same with your “ketchup” and “mustard” icing as well.
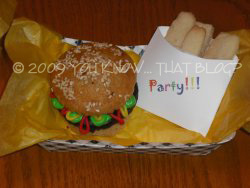
- Place the top of the cupcake bun over, and voila – you have your first “burger”!
You might be saying “eww, sesame seeds on a cupcake?” and I admit I did the same thing at first. However; you don’t really taste them, and in my opinion they “make” the whole thing come together. Without them it would not look nearly as authentic.
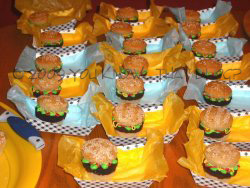
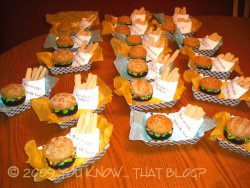
As you complete each burger, place it in it’s own tray…
Fill your french fry slips – and here’s my last tip: if you’re using card stock, the butter from the sugar cookies WILL leech into the paper, so cut some pieces of parchment or waxed paper to fit inside the sleeves, and then fill with the sugar cookie french fries. Place in the tray along side the burger, and voila – you have one awesomely cute confection.
When my daughter first saw these, the first words out of her mouth were… “WOW! You are AWESOME, MOM!” and that made the entire ordeal worthwhile.
Well let me be the first to nominate you for “Mom of the Year”. Those are beyond awesome, although it must have taken you forever!! I’m sure said teen will never forget this special touch :)
That is too daggum cute! And something my wonderful MIL would *totally* do!
Thanks for stopping by my blog (sorry it took me so long to respond…your comment wound up in my spam folder and just thought to check it)
Yep..definately MOM OF THE YEAR candidate!!! Don’t you just love it when your kids say that “You’re the best mom ever!”? Trully great!
Wow. Too stinkin’ cute!!
Wonder if I could impress the 4 year old with this?? Um, yeah!!
Thanks!! xo Debbie
Awesomeness! Love the yellow.
Looking for end of school party ideas- this is awesome!